
Imagine a people that are surrounded by an ocean of books, but never
taught to write. Since this is so incomprehensible, how does one explain the
stance on video education taken by the current culture of education? The
inhabitants of the twenty-first century are flooded with television, video and
film. Not only are students witness to a sea of
presenters and performers but democracy itself requires individuals to find
their public voice, yet students are seldom required to present. Video composition
remains one of the most powerful and useful forms of communication in our
culture, yet video or film creation is generally left out of the canon of our
current curriculum. With such an overwhelming presence of motion picture content
in world culture, it might seem amazing to reflect on how little this medium of
communication has been taught in our schools. Students certainly find it highly motivational to use.
Whatever the problems have been
with older motion picture technology, educators
will find that digital camcorders, computer editing technology and the Internet make this medium of
composition useful for presenting a wide range of information, low cost, relevant to many educational goals, and easy. YouTube's extensive collection of video is the second most frequently searched Web site and the most popular for searching by youth.
Fortunately North Carolina teacher standards have a long history of valuing video composition among its computer literacy competencies. Though accenting the needs of educators, the information and procedures that follow are valuable to anyone considering video production or looking for manageable steps in overcoming fear of public speaking. The information that follows will cover the basic knowledge needed to make a short movie with you as the on-camera star. The goal of this composition is to introduce your theme (e.g., lesson plan for Block or unit plan for Internship) to an audience that includes your students, other teachers and your principal. These steps will lead through the use of a digital camcorder to record the production of approximately two minutes of introduction to your theme.
Study a printout of the video grading rubric to determine which parts of this composition process will need the most attention in the learning to come from this activity. Print this grading rubric. Carefully read this document (the rubric printout) as part of planning and preparation for shooting. Also reading the other essays of the chapter on the educational role of multimedia in general and the relevance of video in particular will also help in thinking not only about the role that the video might play in your instructional sequence but in your teaching career. Stop. Do not proceed past this paragraph until you have printed out and reflected on the video grading rubric page that is linked in it.
Before you read on in this composition, make sure you understand the grading rubric. Incorporate these assessment goals in planning and writing your script. The additional information below will also help in further explaining the important elements of the rubric.
This video must not only establish the major features of your lesson plan or unit plan but also should build motivation for participation by your students. Motivation comes from what your audience sees, the words you use and how you say those words. Be enthusiastic in your use of words in script writing. Smile, be friendly and relaxed in your delivery to the camera. Be clear. Monotone and mumbling will neither work on videotape nor live in front of a classroom of students. If you would like for your videotape to be something other than an introduction to your teaching theme, such as an interview or narrated field trip that is related to instructional idea, please type up your ideas and discuss them with your instructor. Have me initial such a document and include this agreement with your submitted materials.
This web page reviews the details of video composition, gives
examples of problems and successes from prior video composers, and addresses
the final submission of the completed work. Further, it addresses the general relevance to education
and teaching methodology. This video activity integrates and models many
mainstream classroom activities to help you see the relevance and power of
requiring video
production for those that you will teach. For example, this video composition
activity includes a writing component, an oral reading component,
and a self-assessment component.

See the five excellent video examples introduced in chapter five. A series of elements play a central role in any composition. Notice the way some of these elements below reinforce the same elements needed in the writing process and how other elements extend the composer's involvement in the visual part of the composition process.
There are many roles that a video composition general includes and in small scale school and personal compositions are often carried out by one person. These roles are discussed below in light of things to consider in developing this example of a video project. These roles where used would be logical roles to list in the scrolling credits at the end of a film. See the bibliography for lists and descriptions of various roles in television and film crews. These roles also suggest responsibilities for a group of students doing a class video composition.
The producers role is to create a concept or idea that will draw attention to your instructional theme. In the case of this production, time your the reading of this script so that the introduction is just under two minutes, but the closer to two minutes the better. Carefully planning with the script saves an immense amount of time later trying to cut out sentences during the later video editing phase of the production process. Producers not only address the problem of funding sources as well as help scout the talent to appear, which may begin and end with you.
This is a writing assignment. You have a script to write. Write creatively. Remember that people are listening to, not reading your words, so do not let your sentences get too long or complex. Keep your script conversational. You should do this presentation as if the instructional activity is at its beginning stages. You could include samples of student work which you can invent yourself for this video that would be explained as samples from the last time students did this unit plan. When done with a real class of students, you might want to include a student for a couple of sentences describing their project or feelings about their experiences where video release forms that specify Internet display are used. Preview the script carefully for grammar, syntax and meaning.
Write yourself into the script so that there is time in the video in which you are on camera so that you and I can see how you present yourself.
This is a reading fluency assignment. Type your presentation into a word processor and print it out in a large enough font that you can read it verbatim from a few yards away from the camera. This will also help keep you closer to the microphone. Do not ad lib or make it up on the fly. It is a requirement to work on your oral reading skills by reading your script.
This introduction should indicate who you are, the duration of the unit (such as days, weeks, number of class sessions), subject area, and the nature of the content. I would not mention grade level in the videotape so that you would be more easily able to use it at different grade levels. However, do pencil into your script printout the grade level that you had in mind when planning this unit. Indicate the most important objectives of your instruction, particularly those objectives that relate to the NC Standard Course of Study. That is, say something like: "There are some major Standard Course of Study goals that will be covered in this instruction. They are: ...... ." Put these details in words appropriate to your students. One of goals should mention a computer literacy objective. Other sentences should briefly mention computer integration activities that will be included in the unit.
Remember that an introduction covers the highlights of your instructional activities. Your script cannot tell everything.
Make the decisions that have greatest impact on creative judgment. Be on scene during a shoot to make the decisions on choice of shot, prepare the talent and amke the call on the need for a retake. This includes selecting the technology, e.g., type of cameras that will be used to give a particular look to the production. The director is responsible for the overall quality of everything.
Camera Hardware
Digital camcorders are available from Dr. Nickles office and Hunter Library's circulation desk. Try the FlipCam's first and if higher quality is preferred check one of the Sony camcorders that uses DV (Digital Video) tape.
Other important features of using a video camera are covered in the Video Camera Technique page.
If camcorders requiring digital videotape are used instead of the Flipcams or other non-tape cameras, put your work on the first part of the tape so that it is easy to rewind and find. You can work with a used videotape for this assignment. However, you should know that for the best quality videotape, do your practice takes on a used videotape, and then insert a new (not used) videotape for the version that you wish to keep and re-use a tape many times.Videotape
Avoid speaking too fast or too slow. Your cadence should be generally be spirited and your attitude enthusiastic but there are other dramatic flairs that could be chosen. Your reading should be so fluent that I cannot tell that you are reading. Your role models are the professional television new commentators who read their lines from a teleprompter but are so smooth that you cannot tell they are reading. Video magnifies problems with speaking clarity so practice speaking clearly a time or two before you go out to record.Speaking
Don't leave the shooting scene until you have played back your work to make sure you are satisfied with the audio and light levels. Take something that will fit in the cameras headphone jack to the shoot to make hearing the playback easier.
This person has scouted and reported on locations suitable for the shooting of the scenes and has made any necessary transportation and permission arrangements.
The person who directs and uses the camcorder is the videographer or cinematographer. Before you shoot, practice several times in front of the camera before you turn the camera on. If you do not like your "take" after it has been recorded, then rewind the tape and try again. Do not tape one after the other so that I must scan past many copies wondering which version you want me to see. The first copy is the one I will evaluate. It is generally best to have someone help you so that you do not have to walk on and off camera with the camera on, but you can make that part of your script or plan on editing those scenes out later. If you have a partner, have someone turn off the camera before you leave the scene. Some camera have a "fade out" button that can be used to close out a scene; fade out is also a standard transition in the digital video editors that will be used in the next stage of this project.
On-location and outdoor shooting is preferred. On-location but indoors would be next best. The strongest role for video should generally be to bring something to the audience that they can not get by your simply standing in front in them and talking. Come up with a background for your video that contains elements or scenes appropriate to your topic. Consult with the librarian or media specialist at your institution for items that can be used if your collection is not sufficient. For example, if you are introducing an instructional idea, stand in front a bookshelf or display that has book covers and objects relevant to the instructional activities. If you are shooting outside and do not have a structure behind you on which to place relevant objects, you can pick them up as you need them from a table in front of you. The items and background should look appropriate for your audience. That is, using your shower curtain or cluttered kitchen table as backdrop will not enhance your reputation as a professional educator. Further, unless there is some functional classroom use for the date and time information in the video display, make a point of learning how to turn that feature off.
Also, be sure and look at a range of backgrounds chosen by prior students in this course. This will provide additional ideas.
Don't rush on and off the camera scene. Just relax and look at the camera, and let the camera record for three to five seconds before you start talking and after you finish. That will not only prevent chopping off some of the information you intended to record, but will give a more professional start and end to your work. This extra "head and tail" video allows you to more easily cue the tape to the beginning and allow a few moments to turn off a videotape before some other material on the tape begins to play. This head and tail "extra" also provides important flexibility when assembling several video clips into a larger piece with a video editor. Further, the head and tail parts of a video clip are needed in order to have space for the special effects of a transition such as a cross dissolve or fade out and in.
Do not leave the site of a video shooting without playing back the entire clip to check it. Was the camera holder inexperienced, rotating the camera sideways? If so, reshoot the scene. Though this can be rotated to the correct position in video editing software, fixing it in the software will require either distorting the image or cutting off a portion of the image which can greatly lower its quality. Is the audio weak or the words just not spoken clearly enough? Reshoot the scene getting the camcorder closer, the speaking louder and more clear. Is the lighting poor? Reshoot the scene. The far better solution is to do a test recording for one sentence before the complete scene is shot and do test playbacks until all issues are addressed as best as possible for a given situation.
In-Camera Editing
A useful and efficient technique for low cost compositions is to use in-camera editing. This is nothing more than turning the recording feature off after finishing a shot, moving the camera and turning it on again when you are ready to shoot the next sentence or so and scene and continue in sequence with the script until you have finished. Have this editing already done in the camera not only greatly speeds up later editing, but may prevent the need for any later editing, playing it back from the camera just the way it is. This is often sufficient for many instructional uses.
For example, if you were shooting mammals on a farm, you would do an introduction to the theme for a few seconds, then turn the camera off until you had walked to the pen for the first animal(s), turn the camera on and speak at this location, turn it off, move to another animal pen and repeat, and relocate again to do a close-up or tight shot of you for the closing. Or perhaps you are speaking next to a mountain stream, then turn recording off, and refocus the camera on a close-up of your hand in the stream and begin speaking again, then turn recording off to relocate for the closing. To avoid wasting effort, plan these scenes carefully in your script. Further, always do a quick record and then in-camera playback to test whether the camera is recording successfully before starting your sequence of in-camera edits.
Eye Contact - The Teleprompter Concept
Remember, you are modeling a reading and writing activity. Position your script in such a way that you are looking directly into the camera lens when you read it. One excellent method is to tape it directly under the camera lens or have someone serve as your human teleprompter. They should hold the script immediately under the lens and very quietly turn the pages for you. Another method is to use teleprompter software on a laptop. Look at a test playback of the videoclip and if it appears you are looking to one side, or out of the corner of your eyes to read the script, reposition your script and repeat the shooting. Good eye contact is critical for this video presentation.
Television professionals generally do not memorize their lines as do film performers. Instead they use a teleprompter to give the viewer the impression that it has been memorized or is done extemporaneously. Before computers, monitors and printers, these scripts would often be written out by hand and then the pages were turned by hand. Most school projects will not have electronic teleprompters which can cost thousands of dollars. Even though a human teleprompter will still be needed, thankfully the time-consuming process of handwriting of the script can easily be avoided. To make the script large enough to see from a distance, use the Select All command to highlight or select all the text in the word processor. Then change the font size to something much larger. If using a Times font, a 48 point size might be a starting point for moving smaller or larger. How large depends on the type of font being used as some fonts start out much larger than others, so some experimentation is in order. Keep printing out just the first page until the font is right for the distance you wish to stand from the camera. Many prefer to read this script in landscape (print sideways) instead of portrait mode.
One fun project students enjoy is to have their own teleprompter machine to place on a stool or something just under the camera lens. One simple design is to use a cardboard box and two pieces of doweling. Put the doweling on either side of a hole in the cardboard box, a hole that is big enough to display the width of a sheet of paper. Tape your pieces of script together and roll them on one piece of doweling with the end piece taped to the second piece of doweling. Someone will need to turn the doweling as the script is being read.
Another approach is to find software that will turn a computer screen into a professional scrolling teleprompter. A small table, stool or stand is used to put a laptop computer or desktop monitor directly under the camera lens which is mounted on a tripod. This requires exceptional care to make sure the equipment does not fall to the floor if bumped. A simple approach is for the presenter to use a mouse to simply scroll the text to match their reading speed. Having a wireless mouse enables the presenter to control their own scrolling rate, otherwise a human teleprompter helper is sometimes needed to use the mouse to adjust the scrolling rate if needed. Dedicated teleprompter software will allow the reader to set the scrolling speed. Further, some computer laptop and desktop screens come with a Webcam built in that can be used as the video camera while the teleprompter software runs underneath. See the bibliography for teleprompter software solutions that range from freeware to much more. The screencast above is of a teleprompter application called Prompt! which is free and runs on both Mac and Windows computers.
You can also have someone help you with the zoom control on the camera. Camera movement through slow pans (left and right) or tilts (up and down) or other techniques helps to add life and interest to the video. The technique of zooms (in and out) is often overdone while recording and is seen as amateurish. As you begin speaking, the camera could do a pan across the scene, stopping and centering on you. For the end of the tape, the last sentence or so could be spoken with the camera in tight (zoomed in) so that your face and shoulders fill the screen.Add Camera Movement
Make sure your batteries are fully charged and backup batteries are in the bag before leaving for the video shooting events. Where rechargeable batteries are used, recharge as soon as you return and before someone else uses the camera.
Since you are just shooting yourself, you only need to have a copy of the Consent and Waiver Form in your notebook. You do not need to sign it. If however anyone else is included in your video, you must make a copy for them to sign. Children must sign it and also have their parents sign it. Other video release forms that are used in other courses and projects may not be suitable unless like this form they include specific mention that this video will also appear on the Internet. If others are on camera in your tape, these Consent and Waiver Forms should be included with the tape when you turn in the assignment.
Please close attention to any snippets of copyrighted material that might be used by others in the scene in an unplanned way, such as a tune being played from someone nearby radio.
There is a microphone built-in to the camcorder. This will work for a wide variety of situations. Do not position the camera a long way from the speaker and then zoom in. You can't zoom in the sound. (Nor can you read your script if it is far away).
The highest quality audio however comes from plugging a separate microphone into the camera. Some scenes or situations might require a remote wireless microphone. For example, the presenter might be some distance from the camera or background noises might be predicted to be loud and interfering, such a street corner. A remote microphone is worn on your clothing or around your neck. Radio waves send the audio signal to the camcorder. If you are shooting outdoors or in a situation inside in which there will be background noise, it is important to check out this remote microphone to create acceptable audio levels. Some cameras will not work with a remote microphone because they do not provide a special place to attach the receiver. Check with your instructor well in advanced of your shooting date if you might wish to experiment with a wireless microphone. The supply of remotes is very slim so their accessibility is not guaranteed. If you use the remote microphone, test it before you take microphone and camera out for work.
Take headphones with you to the video shooting and plug them into the camera. Don't leave the recording scene until you have played back your work to make sure you are satisfied with the audio.
To better understand the impact of lighting, study the impact of the direction of the light in these sample videotape images, frames taken from the video work of other students in this course. Note that in most cases the light source hits the speaker or their props from the back or side instead of properly from the front. Since the eye is attracted to the portions of the image with the best lighting, the viewer is not concentrating on what the speaker intended. In a couple of case the automatic light settings adjust to a very bright white shirt or blouse on a bright sunny day and then the background becomes too dark or even invisible.
Don't leave the shooting scene until you have played back your work to make sure you are satisfied with the lighting and contrast. Lighting problems that look just passable in the field are likely to come out too bright or too dark once transferred to the computer for later editing.
The composer may write the music or a music director may select various cuts of music or those jobs may be combined into one. For classroom use, use an audio creation from GarageBand, Myna or other sites providing copyright free non-commercial use of the music. Turn this composition into an mp3 file for later insertion during the editing of the videoclips.
The video editor assembles the pieces of the final video in what is called post-production. Once the video is captured, the individual videoclips need to be trimmed and sequence. Titles, scrolling credits, music, voice-over narration and special effects are added together using a non-linear editor on a computer, usually iMovie or Movie Maker for classroom use.
The final stage of video composition is its release to a larger audience. In classroom productions this includes its presentation to students, and its placement sometimes within other productions such as a slideshow or Web site.
Hand In
Having used camcorders with cutting edge digital technology to record and bring the script to life, an important step will have been reached. The capacity to record and play sound and video are the first technologies that truly moved beyond what can be stored communicated with paper technology. In the next stage the video will be edited with technology now within reach of many classroom and home budgets. This is an unprecedented advance in an individual's communication capacity that has only been reached with just the last few years of human culture. The computer has made simple many of the complex and time consuming steps of video communication. This has also significantly expanded the opportunity for entrepreneurial activity for students and adults. It would seem that the jump into the 21st century composition has been completed. Something extraordinarily new has been reached.
However,  before becoming overly impressed with
this new found power, look back at the ingredients which were available for
artful mixing in this composition: planning, content, drama, image, voice,
location, and lighting. Long before writing was invented, these elements
were taught and mastered by the ancient Greeks (and other pre-writing
cultures) as core curriculum components of not only their educational system
and theatre but their public life. (See picture to the left: Credits: Roger Blackwell Bailey). Long before writing was invented, oral skills were central to the emergence of
the open trading of ideas that helped to bring democracy to life in ancient
Greece and elsewhere. Yet today, public speaking is considered to be an intense
and common cultural fear (Snyder & Murphy,
2002; Yudkin, 1992). It is still an important part of language arts and English curriculum. Through acts of students "finding
their voice," public speaking can support other curriculum activities that
aid the emergence of democracy in the classroom and in our communities (see bibliography). An
important aim of democracy (Dewey, 1916) is to empower every individual to
speak and act on their choices in socially responsible ways.
before becoming overly impressed with
this new found power, look back at the ingredients which were available for
artful mixing in this composition: planning, content, drama, image, voice,
location, and lighting. Long before writing was invented, these elements
were taught and mastered by the ancient Greeks (and other pre-writing
cultures) as core curriculum components of not only their educational system
and theatre but their public life. (See picture to the left: Credits: Roger Blackwell Bailey). Long before writing was invented, oral skills were central to the emergence of
the open trading of ideas that helped to bring democracy to life in ancient
Greece and elsewhere. Yet today, public speaking is considered to be an intense
and common cultural fear (Snyder & Murphy,
2002; Yudkin, 1992). It is still an important part of language arts and English curriculum. Through acts of students "finding
their voice," public speaking can support other curriculum activities that
aid the emergence of democracy in the classroom and in our communities (see bibliography). An
important aim of democracy (Dewey, 1916) is to empower every individual to
speak and act on their choices in socially responsible ways.
At the same time that 21st 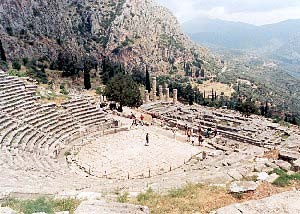 century
technologies provide new power to think and communicate, a connection is
also being made deep into the human past. The affordability and simplicity
of digital camcorders and computer video editing and the global projection
of such work through the Internet is stimulating and revitalizing an ancient
yet increasingly neglected curriculum in our public schools, the curriculum
of public performance. (See picture on right, credits: http://www.sheffieldtheatres.co.uk/) Though the picture of the ancient Greek theatre on the
right reminds us of the deep and ancient roles of public speaking in human
culture, what might the reawakening of this power
through global computer technology mean to our culture? The ancient Greeks
projected to a few thousand in natural amphitheaters; citizens of cyberspace
can project to billions in all corners of the globe anytime day and night. Those educators that
choose to connect with 21st century curriculum goals using audio and video will have a significant way
to make the most of this ancient human capacity.
century
technologies provide new power to think and communicate, a connection is
also being made deep into the human past. The affordability and simplicity
of digital camcorders and computer video editing and the global projection
of such work through the Internet is stimulating and revitalizing an ancient
yet increasingly neglected curriculum in our public schools, the curriculum
of public performance. (See picture on right, credits: http://www.sheffieldtheatres.co.uk/) Though the picture of the ancient Greek theatre on the
right reminds us of the deep and ancient roles of public speaking in human
culture, what might the reawakening of this power
through global computer technology mean to our culture? The ancient Greeks
projected to a few thousand in natural amphitheaters; citizens of cyberspace
can project to billions in all corners of the globe anytime day and night. Those educators that
choose to connect with 21st century curriculum goals using audio and video will have a significant way
to make the most of this ancient human capacity.
Advanced Public Speaking Institute. http://www.public-speaking.org/
Dewey, John (1916). Democracy and Education. New York: Macmillan. Available at http://www.ilt.columbia.edu/publications/dewey.html
Elementary Democracy: Consensus classrooms. Available at http://www.co-intelligence.org/S-consensusclassrooms.html
Wikipedia. (2009). Film Crew. Retrieved September 23, 2009 from http://en.wikipedia.org/wiki/Film_crew
Snyder, Kenneth & Murphy, Thomas J. (2002). What! I Have To Give a Speech? 2nd Edition. Indiana: Department of Education, Washington, DC. ISBN: 0971987408 (full text online in ERIC database)
The Responsive Classroom. Available at http://www.responsiveclassroom.org/
Teleprompter solutions. Search www.versiontracker.com for teleprompter software for both the Macintosh and Windows operating systems. The program Prompt! is a freeware program that runs on both the Mac and Win platforms and is worth exploring. Search Google for teleprompters to find the more expensive professional equipment.
Wikipedia. (2009). Television Crew. Retrieved September 23, 2009 from http://en.wikipedia.org/wiki/Television_crew
Yudkin (1992). Smart Speaking: 60 second strategies for more than 100 speaking problems and fears. Plume. ISBN: 0452267773
Videographer.com: A great place to find a professional videographer. http://www.videographer.com/
version 1.0: 1996; updated version 6.05 February 21, 2011 . Page author: Bob Houghton