


Where you stand, or what you stand in front of during a shoot is
an important part of the message. The view and the words need to reinforce
each other. Further, how easily your audience "reads" or is able to understand
this image depends on how well you use lighting. Lighting is to a picture
as boldface or underlining is to text. Lighting should be used to highlight
or emphasize part of the image, not obscure some parts and de-emphasize
or hide other parts. The viewer needs to be able to quickly sort out the
areas of the image that need their attention first. Since most cameras
have an autofocus system that finds and adjusts its light levels and focus
to the brightest part of the picture, make sure the speaker and any props
that must be seen receive the strongest lighting. However, sometimes you
must work under lighting conditions that you cannot control.
|
|
|
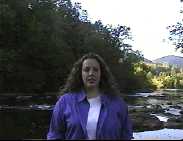
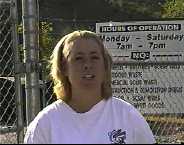
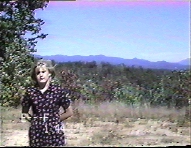
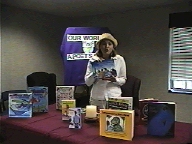
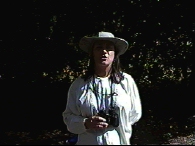
| 1. Plan the time of day for an outdoor shoot so that the camera shows the sunlight striking the front of the speaker and the scene. Here only a distant background has the best lighting. | 2. The camera keys on the white object behind his shoulder, detracting from the speaker's face and the important props on the table. Remove the strong white object in the back and add front lighting. | 3. Opening the door to bring in more light is a good idea. In this scene the camera should be outside looking in with the speaker and props facing the outside. |
|
|
|
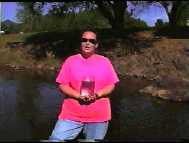
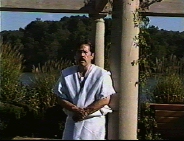
| 4. If you cannot bring the scene into the best light, then move the camera so that it cannot see the brighter areas in the right of this image. | 5. Position yourself so that you face the sun with the relevant scenes in the background. Here the background is right but the positioning needs changing. | 6. Here positioning with the sun is perfect but better to squint than use sunglasses. A less intense foreground shirt color will bring out better scene colors. |
|
|
|
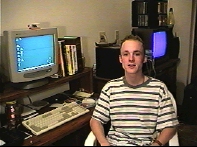
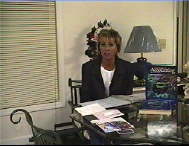
| 7. This scene that leads to a demonstration of a computer program has balanced lighting which highlights the speaker. | 8. The sun correctly lights both the speaker and the scene. | 9. The wall light on the left needs removal or change of aim to hit the scene. Reposition the camera so that it does not see the window on the right. |
|
|
|
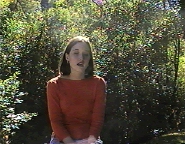
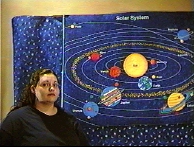
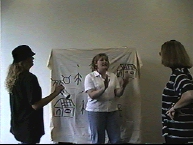
| 10. Better to shoot from the other side of these bushes. Then the sun will light the speaker from the front. | 11. The lighting balance between speaker and the poster is good but would be improved my moving the speaker to the right of poster and turning towards the light coming from the left of the scene. | 12. The camera closes down its lens to deal with the bright white flare from the blouse, which keeps enough light to the background. |
|
|
|
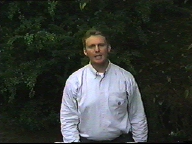
| 13. Rotating the speaker to better catch the sun would remove the shadow over the shoulder. | 14. A floor lamp next to the camera aimed at the speaker would have given better balance. | 15. The eye is pulled to the left of the scene putting more emphasis on the supporting than the central character. |
|
||
| 16. The camera adjusts to the whiteness of the shirt which overly darkens the background. |
These images were taken directly from videotape at the Instructional Technology Center in Killian 268. The Apple Video Player application on the Macintosh computers was used to capture the still images from the tape and save them to diskette. The GIF Converter program was then used to change these files from PICT format to JPEG format. A few of these images were also converted to GIF format and combined in the GIF Builder application to make an animation slideshow.