There is a pair of identical screens movies for each stage of the activity. It is only necessary to choose one of the two sizes of each of the screencasts (at top the of the page) to follow the steps to an introduction to digital animation. One is bigger, so easier to see, and one is smaller so loads and starts playing more quickly. One will be best for your computer and its Net bandwidth.
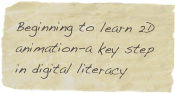
This project uses screencast video to teach composing with media from 4 other elements of the digital palette: text, images, animation and audio. This series of movies introduces animation by animating two objects, a photo and a related set of text. It will also discuss when to use and how to include a short action script, the stop command. A final layer will include audio that was created and edited outside of the Flash animation editor.
Additional layers are also easy to add, so these layers might serve as springboard to your creativity in adding further layers of images and text or other animated graphic objects.
These movies come in two sizes, 70% of the original screen size and 50%. The bigger 70% will be easier to read. The smaller 50% will load and play faster. Choose the size that works best on your computer.
Length total of all screencasts (37 mins)
-
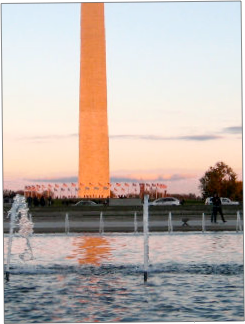
 Stage one (3 mins 40 secs) - Watch a model animation then plan and prepare one of your own. You will just need an instructional photo or graphic image and some related text.
-
Stage two (6 mins 16 secs) - Insert and animate an instructional image, a single layer with a single object.
-
Stage three (4 mins 31 secs) - Insert and animate text, a quotation related to the image or photograph. Next add the action script ‘stop’ command.
-
Stage four (2 mins 8 secs) - Insert an action script command into a layer that stops the animation.
-
Stage five - (1 min 24 secs) Setup the publish choices to put animation in a file format that can be shared on the Web or played from the desktop.
-
Stage six (1 min 12 secs) - Put the animation in a file format that can be shared with online Web editing sites such as Google Sites.
-
Stage seven (1 min 18 secs) - Put the animation in a file format that can be used with desktop editors such as Sea Monkey and Dreamweaver for later uploading.
-
Stage eight (8 mins 46 secs) - Compose an audio composition to help set the tone and meaning of the animation.
-
Stage nine - (5 mins 46 secs) Add the audio file to the animation using the import command (under File in the Flash application) once the audio is a file in mp3 format.
Stage ten - See the finished example.
Adobe Flash CS6 can be downloaded, installed and used for free for thirty days. Some version of Flash will be needed to follow along with these activities.
This work is linked to related compositions:
-
•The Knowledge Society (article)
-
•Digital Literacy Methods chapter on animation (book).
-
•Multimedia Education chapter on animation (book).