Digital Cameras

Using Sony's Mavica (MVC-FD7)
This camera is available for faculty and student projects through the College
of Education and Allied Professions' Director of Instructional Technology,
Mr. Ben Coulter, Killian Bldg. room 270, phone 227-3229.
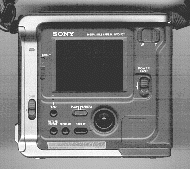
The Mavica uses a diskette for its memory storage. Click the image below
for a larger version of this picture of the back of the camera.
On a side of the camera are Manual or Automatic controls
and a Focus wheel if using Manual.
On the bottom of the camera is a release to take out or insert the
battery.
Startup Steps
-
Make sure you have a Windows formatted disk with plenty of disk space for
your images.
-
Put the camera strap around your neck so that if it accidentally leaves
your hands it will not hit the floor.
-
Use the Power On switch to check battery levels. Once the view window on
the back of the camera lights up, press the Display button. After a second
or two a number will reveal the remaining minutes of battery time. If battery
power is not sufficient, turn off the camera and remove the battery and
place it in the recharger that comes in the camera case. The camera only
runs off its battery, not from regular 110 electrical power. Always
remember to recharge the battery before putting the camera away in
its case. The next shooter is depending on you!
-
Press the release lever on the back of the camera to remove and/or insert
a diskette.
-
Once the camera is turned on and holds a disk, aim the camera at practice
targets experimenting with different controls on its back and side.
-
If shooting inside or in darker conditons outside, press the Flash
button. It will not come on automatically.
-
Use your thumb on the Zoom lever near the top right of the camera.
-
Set the Play-Camera button to camera for shooting and Play for review of
images on the disk.
-
The shutter release (the fire button) is on the front of the camera
near your right index finger.

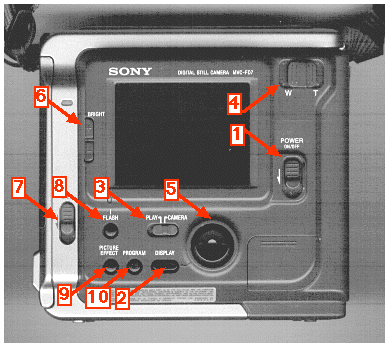
| By the numbers above: |
|
1. Power On/Off switch
2. Display button providing remaining battery time and other features
3. Play (review) or Camera (shoot) switch
4. Zoom from Wide to Tight
5. Display controller when reviewing |
6. Brightness
7. Battery release
8. Flash
9. Picture effect
10. Program |
Once useful images are captured, they can be opened in many applications
that can read .BMP format, including Powerpoint, Word, Access, PhotoDraw,
PhotoEditor and many others. Many of these other programs can save the
files in the formats needed by the Web: JPG, GIF and BNP.
Page author: Houghton


